Wednesday, November 19, 2014

How to configure Solaris11 client servers to connect multiple REPO via HTTP

Configuring repository on Solaris 11 client system using HTTP.

In my environment already I have a REPO server , Using that server I am configuring client REPO.

Please refer this link for how to configure multiple REPO using HTTP in server side -( how-to-configure-multiple-repo ).

We need to check first, the actual solaris publisher which is configured for the client server (by default it’s the oracle public repository).

Verify the current publisher details:
root@clnode2:~# pkg publisher
PUBLISHER                   TYPE     STATUS P LOCATION
solaris                     origin   online F http://pkg.oracle.com/solaris/release/
root@clnode2:~#
We can reset the origin of this Solaris Publisher by using these options: 
-G '*' -> Removes all existing origins for the solaris publisher.
-M '*' -> Removes all existing mirrors for the solaris publisher.
-g -> Adds the URI of the newly-created repository as the new origin for the solaris publisher.

Can use server name or IP address to configure publisher (I am using here IP address)

Setting up publisher for OS package (Server IP and port number ):
root@clnode2:~# pkg set-publisher -G '*' -M '*' -g http://192.168.10.11:81/ solaris
root@clnode2:~# pkg publisher
PUBLISHER                   TYPE     STATUS P LOCATION
solaris                     origin   online F http://192.168.10.11:81/
root@clnode2:~#
Setting up publisher for Sun Cluster package - ha-cluster:
 
-G ’*’ Removes all existing origins for the ha-cluster publisher.
-M ’*’ Removes all existing mirrors for the ha-cluster publisher.
-g Adds the URI of the newly-created local repository as the new origin for the ha-cluster publisher.
root@clnode2:~# pkg set-publisher -G '*' -M '*' -g http://192.168.10.11:80/ ha-cluster
root@clnode2:~# pkg publisher
PUBLISHER                   TYPE     STATUS P LOCATION
solaris                     origin   online F http://clnode1:81/
ha-cluster                  origin   online F http://192.168.10.11:80/
root@clnode2:~#
All went fine ... Cool...

Friday, November 14, 2014

How to configure multiple REPO and update local repository via SRU on Solaris11


This article is about to create multiple REPO and update the local  REPO via SRU.
1. Download latest incremental repo SRU from oracle site.
2. Setting up the local system as a IPS Repository Server [HTTP interface]
3. Updating the local repository with incremental Solaris 11.1 SRU


Setting up the local system as a IPS Repository Server[HTTP interface]:

Since already I have a local repo configured in my server, so now just I am updating and enabling this repo as a HTTP interface. You can refer How to build REPO from the scratch (link - creating-ips-repository-on-solaris-11)

This is my local repo FS and current publisher status:
root@clnode1:~# df -h /repo
Filesystem             Size   Used  Available Capacity  Mounted on
repo                    20G   7.0G        13G    36%    /repo
root@clnode1:~#
root@clnode1:~# pkg publisher
PUBLISHER                   TYPE     STATUS P LOCATION
solaris                     origin   online F file:///repo/
root@clnode1:~#
I have downloaded SRU ISO image in to my local disk and shared that folder. Now I am mounting shared folder as a /mnt mount point(Using OVM VBOX):
root@clnode1:~# mount -F vboxfs solaris /mnt
root@clnode1:~# df -h /mnt/
Filesystem             Size   Used  Available Capacity  Mounted on
solaris                233G   160G        73G    69%    /mnt
root@clnode1:~#
From /mnt mountpoint I am mounting SRU ISO as a /a mountpoint:
root@clnode1:~# lofiadm -a /mnt/SRU/sol-11_1_21_4_1-incr-repo.iso
/dev/lofi/1
root@clnode1:~# mkdir /a
root@clnode1:~# mount -F hsfs /dev/lofi/1 /a
root@clnode1:~# df -h /a
Filesystem             Size   Used  Available Capacity  Mounted on
/dev/lofi/1            3.9G   3.9G         0K   100%    /a
root@clnode1:~#
Unset existing publisher:
root@clnode1:/# pkg unset-publisher solaris
root@clnode1:/# pkg publisher
PUBLISHER                   TYPE     STATUS P LOCATION
root@clnode1:/#
Set publisher using IP address and port:
root@clnode1:/# pkg set-publisher -g 'http://192.168.10.11:81' solaris
root@clnode1:/# pkg publisher
PUBLISHER                   TYPE     STATUS P LOCATION
solaris                     origin   online F http://192.168.10.11:81/
root@clnode1:/#
Check the repo version :
root@clnode1:/# pkgrepo list -s http://192.168.10.11:81 | grep entire
solaris   entire           0.5.11,5.11-0.175.1.0.0.24.2:20120919T190135Z
root@clnode1:/#
To access client servers to this repo via HTTP we need to enable the application/pkg/server (SMF) service:
root@clnode1:/# svccfg -s application/pkg/server setprop pkg/inst_root=/repo
root@clnode1:/# svccfg -s application/pkg/server setprop pkg/port="81"
root@clnode1:/# svcs -a | grep -i /pkg/server
disabled        5:41:17 svc:/application/pkg/server:default
root@clnode1:/# svcadm enable svc:/application/pkg/server:default
root@clnode1:/# svcs pkg/server
STATE          STIME    FMRI
online          2:32:29 svc:/application/pkg/server:default
root@clnode1:/#
Updating the local repository with the incremental Solaris 11.1 SRU:
root@clnode1:/# pkgrecv -s /a/repo -d /repo '*'
Processing packages for publisher solaris ...
Retrieving and evaluating 783 package(s)...
PROCESS                                  ITEMS    GET (MB)   SEND (MB)
library/security/openssl                533/783   1445/3557   3066/8455
root@clnode1:/#
Building a Search Index:
root@clnode1:~# pkgrepo -s /repo refresh
Initiating repository refresh.
root@clnode1:~# 
Refresh and Restart the SMF service:
root@clnode1:~# svcadm refresh svc:/application/pkg/server
root@clnode1:~# svcadm restart svc:/application/pkg/server
root@clnode1:~# 
Verifying updated repo is available:
root@clnode1:~# pkgrepo list -s http://192.168.10.11:81 | grep entire
solaris   entire          0.5.11,5.11-0.175.1.21.0.4.1:20140701T165705Z
solaris   entire          0.5.11,5.11-0.175.1.0.0.24.2:20120919T190135Z
root@clnode1:~#
I can see the /repo FS got increased after update the repo:
root@clnode1:~# df -h /repo
Filesystem             Size   Used  Available Capacity  Mounted on
repo                    20G   8.2G        11G    43%    /repo
root@clnode1:~#
Cool... We have successfully upgraded LOCAL REPO using ISO image. 

Steps to Create Multiple REPO's: 
Above already we have created "solaris" REPO for OS packages. Now I am creating REPO for Solaris Cluster package. 
Mounting ISO REPO Image:
root@clnode1:~# df -h /mnt
Filesystem             Size   Used  Available Capacity  Mounted on
solaris                233G   162G        71G    70%    /mnt
root@clnode1:~# lofiadm -a /mnt/4.1/osc-4_1-ga-repo-full.iso
/dev/lofi/1
root@clnode1:~# mount -F hsfs /dev/lofi/1 /a
root@clnode1:~#
Setting up publisher for Solaris Cluster REPO: 
Check the publisher name:
root@clnode1:/# pkgrepo get -s /a/repo
SECTION    PROPERTY    VALUE
publisher  prefix      ha-cluster
repository description This\ repository\ serves\ a\ copy\ of\ the\ Oracle\ Solar                                                                                        is\ Cluster\ 4.1\ Package\ Repository.
repository name        Oracle\ Solaris\ Cluster\ 4.1\ Package\ Repository
repository version     4
root@clnode1:/#
Set publisher ha-cluster:
root@clnode1:~# pkg set-publisher -g file:///a/repo/ ha-cluster
root@clnode1:~# pkg publisher
PUBLISHER                   TYPE     STATUS P LOCATION
solaris                     origin   online F http://192.168.10.11:81/
ha-cluster                  origin   online F file:///a/repo/
root@clnode1:~#
To access client servers to this REPO via HTTP we need to create SMF service using application/pkg/server (SMF) service:
root@clnode1:/# svccfg -s pkg/server add ha-cluster
root@clnode1:/# svccfg -s pkg/server:ha-cluster setprop pkg/port=80
root@clnode1:/# svccfg -s pkg/server:ha-cluster setprop pkg/inst_root=/a/repo
root@clnode1:/# svccfg -s pkg/server list
:properties
default
ha-cluster
root@clnode1:/#
Refresh and enable ha-cluster SMF service:
root@clnode1:/# svcadm refresh application/pkg/server:ha-cluster
root@clnode1:/# svcadm enable application/pkg/server:ha-cluster
root@clnode1:/# svcs -a | grep -i ha-cluster
online          0:57:10 svc:/application/pkg/server:ha-cluster
root@clnode1:/#
Check the PORT status (we configured for REPO - 80 & 81):
root@clnode1:/# netstat -an | grep *.81
      *.81         *.*                0      0 128000      0 LISTEN
root@clnode1:/# netstat -an | grep *.80
      *.80         *.*                0      0 128000      0 LISTEN
root@clnode1:/#
Nice ... Successfully created multiple REPO and update local REPO.

Wednesday, November 12, 2014

How to change hostname in Solaris11

As all we know, there are lot of changes in Solaris11. To change the hostname aka node name in Solaris11 we have to modify the SMF properties as they eliminated most of the file base update.

Here are the steps to change hostname aka nodename in Solaris11.

Check the current properties value:
root@clnode1:~# svccfg -s system/identity:node listprop config
config                       application
config/enable_mapping       boolean     true
config/ignore_dhcp_hostname boolean     false
config/loopback             astring
config/nodename             astring     clnode1
root@clnode1:~# 
Set / Change Hostname :
root@clnode1:~# svccfg -s system/identity:node setprop config/nodename=node2
root@clnode1:~# svccfg -s system/identity:node setprop config/loopback=node2
root@clnode1:~#
Refresh the properties and restart the service to take effect:
root@clnode1:~# svccfg -s system/identity:node refresh
root@clnode1:~# svcadm restart system/identity:node
root@clnode1:~# 
Update the /etc/hosts file and verify the changes:
root@clnode1:~# svccfg -s system/identity:node listprop config
config                       application
config/enable_mapping       boolean     true
config/ignore_dhcp_hostname boolean     false
config/nodename             astring     node2
config/loopback             astring     node2
root@clnode1:~# hostname
node2
root@node1:~# cat /etc/hosts | grep -i 192.168.10.12 
192.168.10.12 node2
root@clnode1:~#
Cool.. Completed our task successfully.

How to change IP address on Solaris 11

We have moved from traditional method to new method to change IP address in Solaris11.
Below is the steps for changing IP address on Solaris11.


Check the current Status:
root@clnode1:~# ipadm
NAME              CLASS/TYPE STATE        UNDER      ADDR
lo0               loopback   ok           --         --
   lo0/v4         static     ok           --         127.0.0.1/8
   lo0/v6         static     ok           --         ::1/128
net0              ip         ok           --         --
   net0/v4        static     ok           --         192.168.10.11/24
   net0/v6        addrconf   ok           --         fe80::a00:27ff:fe15:9f0f/10
root@clnode1:~#
Delete existing IP address. Note (When you remove primary IP address you should be in console):
root@clnode1:~# ipadm delete-addr net0/v4
root@node2:~# ipadm
NAME              CLASS/TYPE STATE        UNDER      ADDR
lo0               loopback   ok           --         --
  lo0/v4         static     ok           --         127.0.0.1/8
  lo0/v6         static     ok           --         ::1/128
net0              ip         ok           --         --
  net0/v6        addrconf   ok           --         fe80::a00:27ff:fe15:9f0f/10
root@node2:~#
Assign new IP address and check the status:
root@node2:~#ipadm create-addr -T static -a 192.168.10.12/24 net0/v4
root@node2:~# ifconfig -a
lo0: flags=2001000849 mtu 8232 index 1
        inet 127.0.0.1 netmask ff000000
net0: flags=1000843 mtu 1500 index 2
        inet 192.168.10.12 netmask ffffff00 broadcast 192.168.10.255
        ether 8:0:27:15:9f:f
lo0: flags=2002000849 mtu 8252 index 1
        inet6 ::1/128
net0: flags=20002004841 mtu 1500 index 2
        inet6 fe80::a00:27ff:fe15:9f0f/10
        ether 8:0:27:15:9f:f
root@node2:~# ipadm
NAME              CLASS/TYPE STATE        UNDER      ADDR
lo0               loopback   ok           --         --
   lo0/v4         static     ok           --         127.0.0.1/8
   lo0/v6         static     ok           --         ::1/128
net0              ip         ok           --         --
   net0/v4        static     ok           --         192.168.10.12/24
   net0/v6        addrconf   ok           --         fe80::a00:27ff:fe15:9f0f/10
root@node2:~#
Update /etc/hosts file:
root@node2:~# cat /etc/hosts | grep 192.168.10.12
192.168.10.12 clnode2
root@node2:~#
We have successfully changed IP address. Cool...

Wednesday, November 5, 2014

Recover root password on Solaris 11

In my environment, recently I have faced issue with root password on one of the Solaris11 VM.
Here challenging to recover root password for this server.
These are the steps to recover root password on Solaris11 OS.

Overall activity's:
  1. In the VM guest settings, select CDROM as a Solaris11 ISO Image.
  2. Boot up from the Solaris11 ISO Image.
  3. Select the option 3 'Shell ' from the menu.
  4. Import RPOOL.
  5. Set the mount point for /root FS.
  6. Mount /root FS.
  7. Take backup of passwd and shadow files  and edit shadow file.
  8. Remove password entry for root user from shadow file.
  9. Unmount /root FS.
  10. Set /root mount point to /.
  11. Export rpool.
  12. Shutdown the server.
  13. Change boot device back to hard disk as a first boot.
  14. Power on the Solaris11 VM.
  15. From GRUB menu press "e" to boot the server in to single user mode.
  16. From the MENU select "$multiboot column" and end of the line add -s to boot the server in to single user mode and press F10 to boot the server.
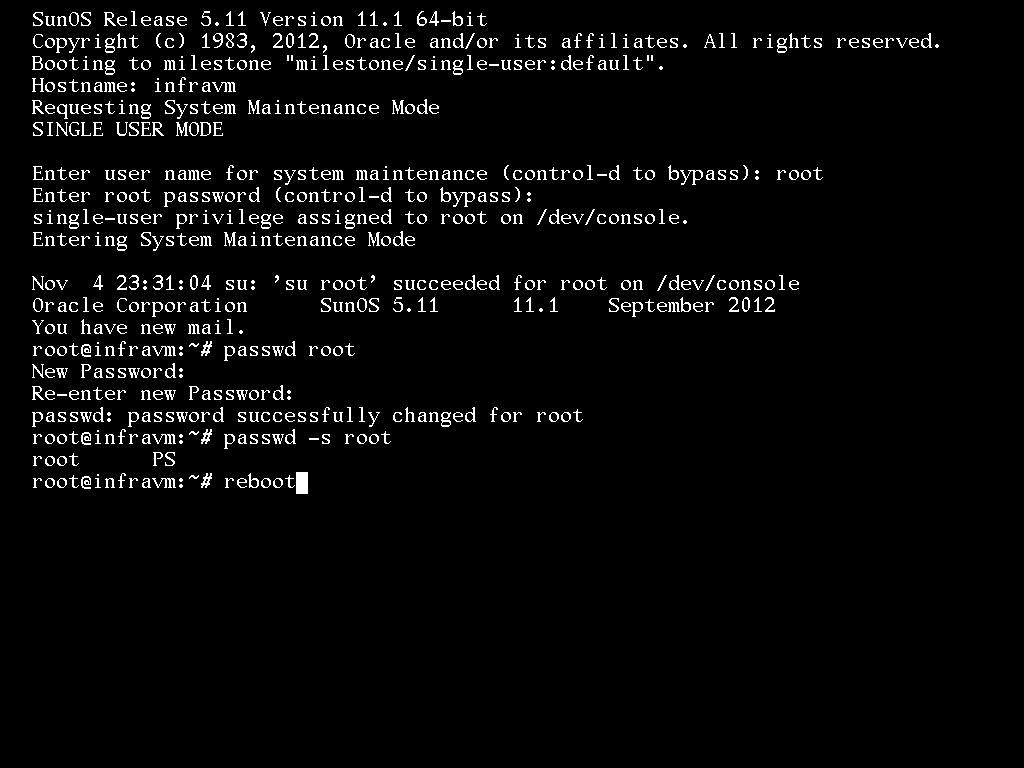
  17. Enter user name "root" and for password just enter (without password).
  18. Once get the prompt and set password to root user.
  19. Reboot the server to boot into multiuser mode.
Press F2 to get the BIOS settings option

Set CDROM as a first boot device

Press F10 to save and exit

Select the option 3 "Shell" from the menu

Check availability of rpool
Import rpool

Set the mount point for /root FS

Mount /root FS

Check mount point status and take backup of password and shadow files

Check the root password entry from shadow file

Edit shadow file and remove only password entry

Make sure root password entry deleted from shadow file

Unmount /root FS 
Set /root mount point to / 
Export rpool
Shutdown the server

Change boot device back to hard disk as a first boot
Power on the Solaris11 VM
From this menu press "e" to boot the server in to single user mode

Go down and select "$multiboot column" and end of the line add -s to boot the server in to single user mode
Press F10 to boot the server

Enter user name "root" and for password just enter (without password)
once get the prompt and set password to root user
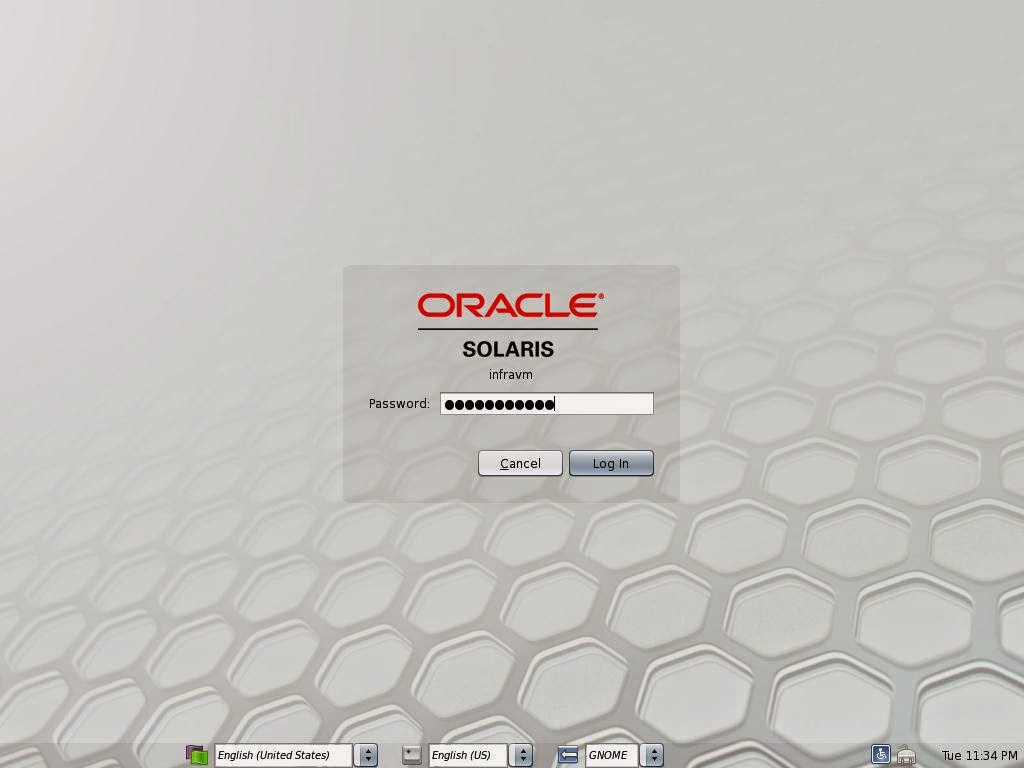
Reboot the server to boot into multiuser mode

Now we can able to login with root user